
PuTTY is a popular free and open-source SSH and Telnet client that is widely used for accessing and managing remote servers and systems. Developed by Simon Tatham a British programmer in January 1999, supports multiple network protocols like SSH, Telnet, Rlogin, serial port and raw socket connection.
It support command-line SCP (Secure Copy Protocol) and SFTP (Secure File Transfer Protocol) clients for secure file transfer.
Table of Contents
Elements of PuTTY: –
PuTTY installation package contains other components like:
PuTTY
terminal emulator SSH and telnet client.
PSCP (PuTTY Secure Copy Protocol)
Secure file copy through command line.
PSFTP (PuTTY Secure File Transfer Protocol)
is a SFTP client running on command line for secure data transfer sessions.
PuTTYtel
telnet client only.
Plink (PuTTY link)
PuTTY is a command line tool without a graphical interface.
Pageant (PuTTY authentication agent)
An SSH Authentication agent.
PuTTYgen (PuTTY Key Generator)
a RSA and DSA key generator tool.
Pterm
Independent terminal emulator.
Key Features of PuTTY: –
Support IP version 6.
Built-in X11 forwarding.
Control on SSH encryption key.
Save and manage the session.
Use of PuTTY
It is a highly essential tool for those who involved in the IT sector, network management, and development. Its main purpose is to create a remote connection and manage cryptographic keys which enhance security during communication. It provide secure SSH Tunnel X11 forwarding to ensure safe communication and import or export of data.
PuTTY provides a user-friendly interface for connecting to server and performing various task such as running commands, transferring data, and managing network configurations.
Download and Install PuTTY on Windows
It is a free Telnet and SSH client for Windows, officially available for Windows platform. You can operate and manage ssh server functions like download and transfer files, and troubleshooting errors.
PuTTY.exe tool is used in Windows which supports operating system like Windows 10, Windows 11 and many more. Choose the appropriate 32-bit or 64-bit version of PuTTY download.
List of versions of Windows operating system support PuTTY:
- Window 7.
- Window 7 ultimate.
- Window 8.
- Window XP.
- Window Vista.
- Window 2000.
- Window 95.
- Window 98.
- Window NT.
- Window ME.
Install PuTTY on Windows: –
After downloading, locate the installer on your computer (.msi file).
Install the software by double-click on the file to run it. Click on “next“.
Select an option according to your preference and click on next.
After installation. Select the option to create the desktop icon. Click on the finish button to exit.
Using PuTTY on Windows Operating System for SSH session:
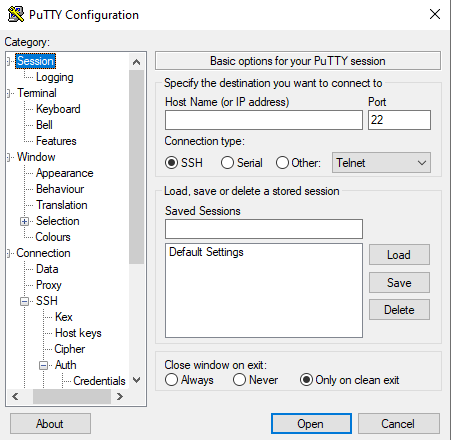
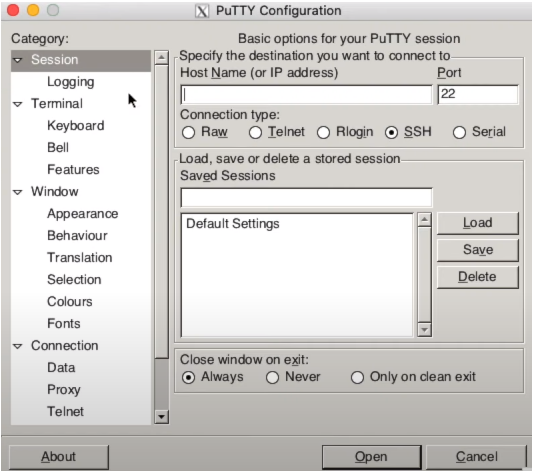
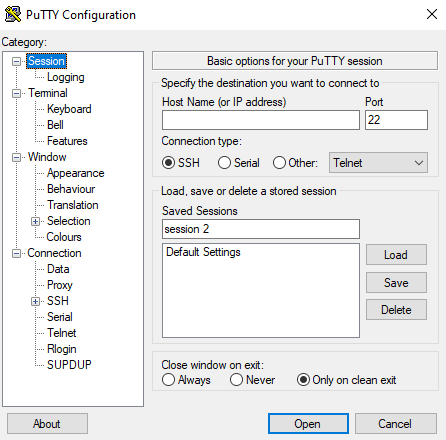
You can start the program from desktop or from the start menu. A Host Name section is on the right side of the configuration.
On the left panel layout category option is available to change and modify configuration settings. After making the desired changes, click on the apply button to save the setting.
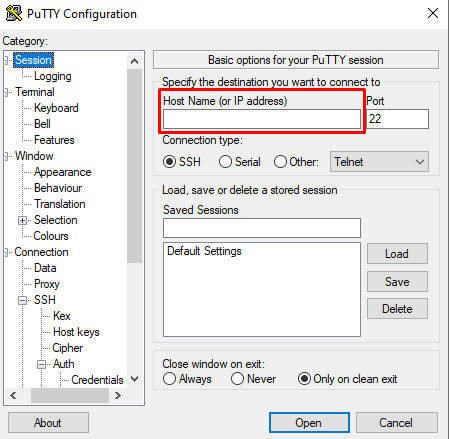
Enter the username and IP address of the remote system you want to connect to in Host Name section. Select connection type the port number automatically fill, but on selecting connection to RAW type the port number has to fill manually.
On selecting the connection type to Serial, the Hostname section will change to serial bar and port to speed and then Click on open. Enter username and password when prompted. Now you successfully using SSH protocol in PuTTY to establish secure remote connection.
Note : It is recommended that do not use Telnet connection because it is less secure connection. However, it does not secure the data between client and server. Due to this anyone can steal your username, passwords, and other data.
Save Session:
Saving sessions on the PuTTY allows Windows users to store information like hostname, IP address, and other settings for quick access. It follows a few steps: –
Open PuTTY configuration window, in the Hostname section, enter username or IP address you want to connect to a remote server.
Enter name of connection in the Saved session section and then click on the save button.

By saving the session you can access the server without re-enter details every time you connect to them.
Manage Sessions
PuTTY allows user to load, add, delete, and save sessions making it easier to establish a secure connection between servers. We will explore various aspects of managing sessions in putty.
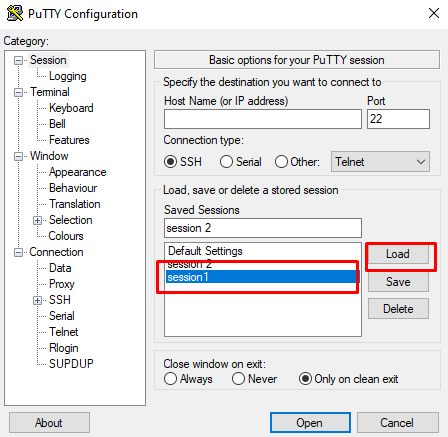
Load Saved Session
On the PuTTY configuration window select the session from Default setting and click on load to Load the session.
Organizing Session
As the list of saving sessions is more, keeping them in an organized way is important. PuTTY allows to create a folder in a saved session. This help to categorize sessions. It makes it easier to find the server you want to connect.
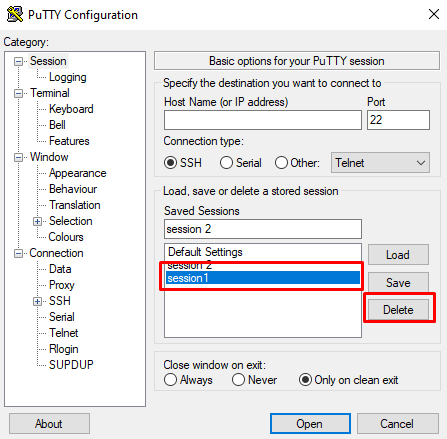
Deleting Session
If you do not need a session longer then you delete it. It can free some space in the saved session. To delete a session, select the session and click on the delete.
Managing sessions is an efficient way to connect remote servers while working with multiple systems. It helps save time while connecting.
FAQ
Q.1 How to connect Linux server from Wndows using putty?
To connect Linux from Windows, download and install PuTTY. Open PuTTY, in Hostname section enter the username and IP address of Linux server. Set connection type to SSH and port to 22 and click on open. After this terminal is open and enter the username and password when asked. Now you are connect to Linux server by PuTTY client.
Q.2 Can I connect to remote server without knowing the IP address of remote server in Windows by using PuTTY?
No, it is not possible to connect without IP address.
Q.3 Can Windows terminal replace PuTTY?
Yes, Windows terminal is modern tool with advanced features. It has built-in support for Secure Shell client.
Q.4 Can PuTTY is used as a server?
No, PuTTY is not designed as a server. It is just a terminal emulator for SSH clients for widows and other OS. It is used to establish a secure remote connection. If you need a server on Windows use other software like OpenSSH provide both SSH server and client capabilities.
Download and Install PuTTY on Linux
It is highly configurable free telnet-ssh client and also support many operating systems, Linux is one of them. It is very popular among Linux user allows to execute SSH commands, through command line interface.
It offers a variety of configuration in secure remote terminal, also provide control over the SSH encryption key and networking protocols.
In LinuxOS, there is a pre-installed terminal emulator to connect server. But they use PuTTY to connect raw socket and serial ports for debugging use.
Below we provide installation process of PuTTY in different Linux distribution systems:
Installing on Ubuntu
In Ubuntu, PuTTY is installed via a terminal. Follow some steps to install it: –
The primary requisite is to enable the Ubuntu universe repository, so you can get access to software package and update your system.
Open the terminal (Ctrl+Alt+t) and run command to check whether the repository is enabled or not
sudo add-apt-repository universe
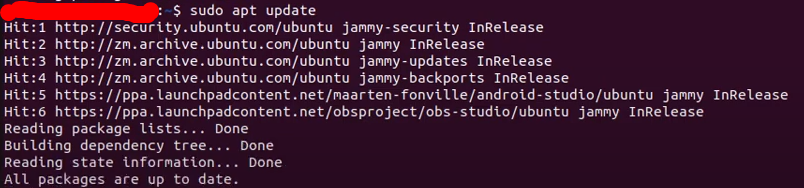
Before installing, to update the repositories to make sure to install latest version of Putty the command:
sudo apt update
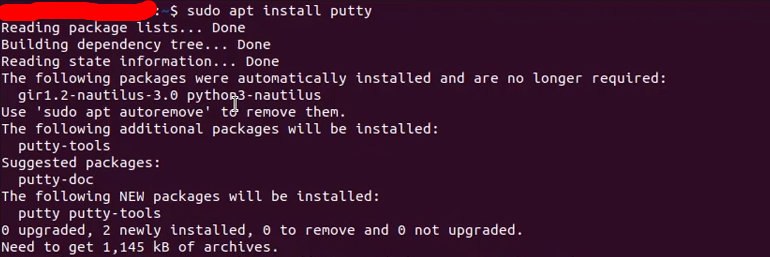
To install PuTTY execute command:
sudo apt install putty
After installation, verify it and check the program version, and description by performing command
dpkg -1 | gerp putty
Installing on Debian Linux
For Debian Linux distribution type this command
sudo apt-get install putty
Installing on Fedora and Red hat Linux
The default manager is use to install PuTTY on Fedora and Red Hat Linux system by carry out command
sudo dnf install putty
Installing on Centos
The distro manager is used to install PuTTY on Centos7 and earlier versions. execute command
sudo yum install putty
For CentOS 8 and later version apply command
sudo dnf install putty
Installing on Arc Linux
PuTTY is also available for Arc-based Linux system. Run command
sudo pacman -S putty
Use SSH on Linux for Configuring session:
Open PuTTY from terminal. The Linux version looks very similar to the Windows version. The process of using SSH on Linux for configuring session is similar to Windows. PuTTY provide a graphical user interface (GUI) for setting up and initiating SSH connections, making it user-friendly and accessible for managing remote server connections.
On the other hand, a secure connection is the need of every user while connecting to a distant server. While PuTTY is trusted platform, but there are other SSH clients which offer more advanced features while connecting to remote system.
Public key Authentication on Linux Server: Generate and Manage SSH key
Public key authentication is supported by PuTTY. PuTTYgen the component of PuTTY is used to generate the SSH key pair (private and public key) via ssh encryption. The key is save in .ppk format.
Using PuTTYgen to generate RSA key, run command:
Puttygen -t rsa -b 2048 -o thekey.ppk
For Public key authentication, apply this command:
puttygen -L mykey.ppk
Download and Install PuTTY on Mac
PuTTY is an popular ssh client used to connect to remote server terminal. Originally developed for Windows platform, but now it supports MacOS. For programmers, developers, and administrators PuTTY is an excellent choice to securely transmission of data to SSH server.
To expand your knowledge about PuTTY explore How to and VS pages. Weather you are an experienced or newbie user these pages offering you in-depth knowledge, and valuable information.
Install PuTTY on Mac
There are mainly two method to install PuTTY on Mac by ports: –
Homebrew method
Homebrew is a package manager for MacOS. It allows to install, and delete software by running commands in the terminal. We have to install homebrew first. The Homebrew X-command line tool has to be installed on your computer. For this open the terminal, type this command
/usr/bin/bash -c “$(curl -fsSL https://raw.githubusercontent.com/Homebrew/install/master/install.sh)”

Then press enter and type your Mac password. Homebrew is completely installed. After this, to install PuTTY use this command
sudo brew install putty
MacPorts Method
In this method, the primary requisite is to download the X-code command line tool. There is no need to download the big size X code package.
To open terminal, go to Finder>search utilities>terminal.
This tool can be installed by typing this command in the terminal.
xcode-select –install
Then complete the installation procedure.
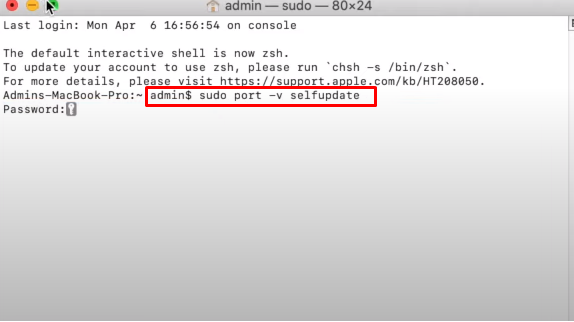
After this download and install MacPorts. Execute this command to update the package,
sudo port -v selfupdate
To install PuTTY execute this command, to ensure download latest version of PuTTY.
sudo port install putty

After installing, restart the system.
Search putty in the terminal and open it.
To add a shortcut on the desktop icon
cp /opt/local/bin/putty ~/desktop/putty
Bulit-in Terminal in MacOS
Not in all but MacOS X has a built-in terminal command line option. You open this by going to Finder>search utilities>terminal. It supports SSH connections to access the server by following ways:
In an open terminal window, you can directly enter the ssh hostname
- user@hostname to connect remote server
- In terminal select a new remote connection from the menu option. It opens a dialog box to enter the hostname of external server to connect.
FAQ
Q.1 Can you download PuTTY on Mac?
Yes, you can download and use PuTTY on Mac.
Download and Install PuTTY on Chromebook
PuTTY is an open-source and free software designed for Windows, at present time it also suitable for Chromebook (not officially). It allows user to execute command, and manage functionalities on external server.
Install PuTTY on Chromebook
Chromebook has its own built-in Linux terminal, eliminating the need to install an external terminal. Follow these steps to install it: –
The primary requisite to enable it, go to Settings >Advanced >Select the developer option here.
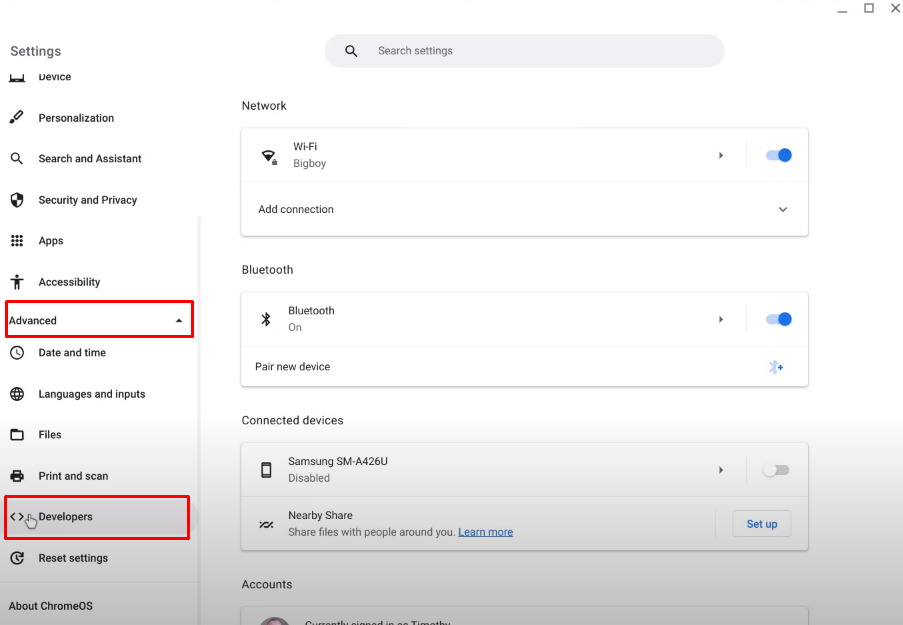
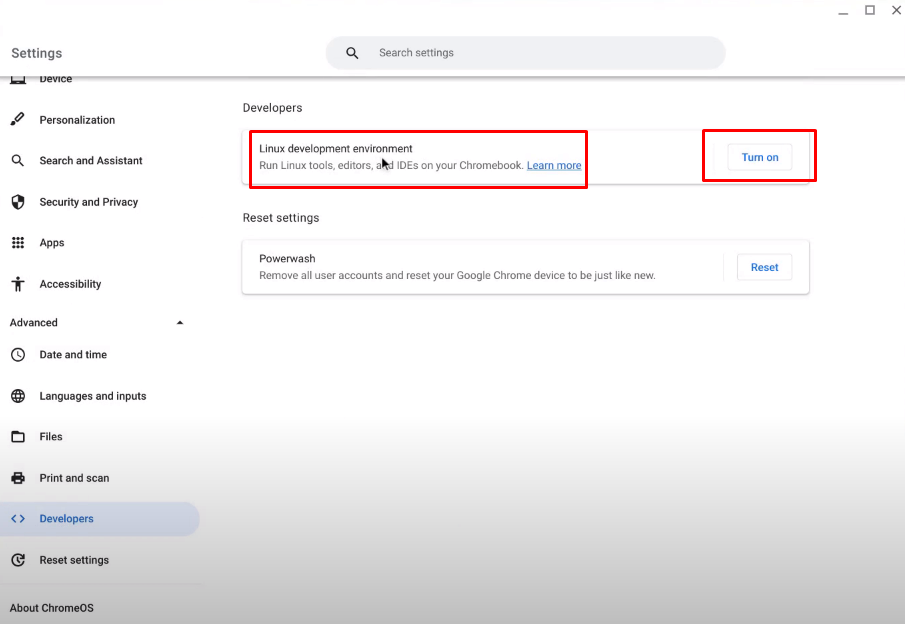
On the right side Linux development environment appears, then click on Turn on
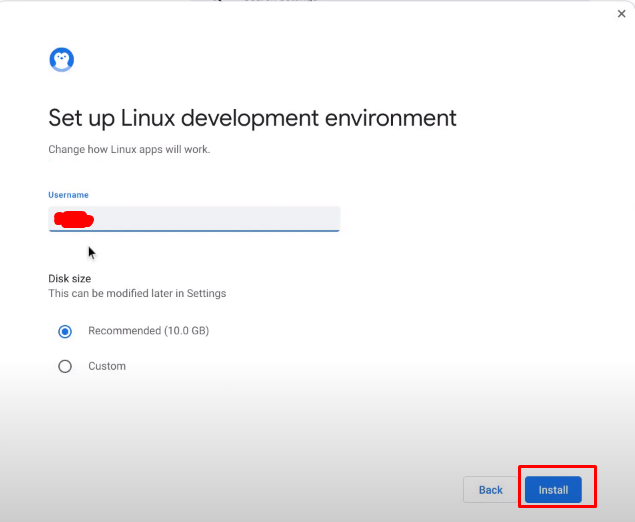
The Linux development environment window appears, Click on the next. After this set the username according to your preference, Click on next.
Then installing is start. After complete installation, terminal window automatically appears.
Before installing, you need to update the package. For this type command
sudo apt-get update

After this run command to get putty
sudo apt-get install putty -y

Press ‘enter’, and the operation starts. After a few seconds, it will ask for confirmation. Press ‘y’ and then enter
Then installing is start. It will take 20 to 30 seconds. After complete installation, you will see the PuTTY icon on the Linux app or either window screen.
Using PuTTY on Chromebook Connect to Remote Server
In Chromebook, open PuTTY from terminal (Ctrl+Alt+t) by runing command PuTTY.
In PuTTY configuration Windows, enter the IP address and username of the SSH server in the Hostname section. Set connection type to SSH. Click on Open to start the connection.
If PuTTY does not satisfy your needs than you can also check other SSH clients for Chromebook.
FAQ
Q.1 Can PuTTY install on Chromebook without Linux terminal?
No, It is not possible because chrome itself do not support PuTTY installation . While Linux terminal provide an environment to install PuTTY on Chromebook.
Download and Install PuTTY on Raspberry Pi
PuTTY enables user access, and operate other function on remote device. It is an free SSH client to connect remote server. Raspberry Pi is a small size computer that connects to a computer monitor and TV. PuTTY allows user to control, and access Raspberry Pi from another computer by using SSH key management system.
Install PuTTY on Raspberry Pi
Follow few instructions to install: –
Open the terminal window on Raspberry Pi and run the command.
sudo apt install putty

After completing the installation, Open it from the menu bar.
FAQ
Q.1 Can I use PuTTY to connect to my Raspberry Pi from a Windows computer?
Yes, you can connect Raspberry from Windows computer by PuTTY.
Q.2 Can I transfer files from windows to Raspberry Pi by PuTTY?
Yes, PuTTY has PSFTP component for secure transfer of files.
From this resource you are able to download PuTTY for different operating system, make it easier for user to establish a secure remote connection. So, you can operate the function on remote desktop server and managing SSH key.